Segment is a customer data platform (CDP) that enables you to capture data from many sources and send it to many destinations. This is a guide for our favorite one of those destinations: PostHog.
Before you start... we recommend you read our CDP integration guide to understand the different options for integrating with PostHog.
Setting up Segment
Make sure you have a Segment account and a PostHog instance, using PostHog Cloud or self-hosted running version 1.30.0 or later.
Once you have Segment and your source(s) set up, go to the destinations tab in your Segment workspace, click Add Destination, and search for PostHog.
After selecting PostHog, click Add Destination, choose your source(s), add a name, and click Create destination.
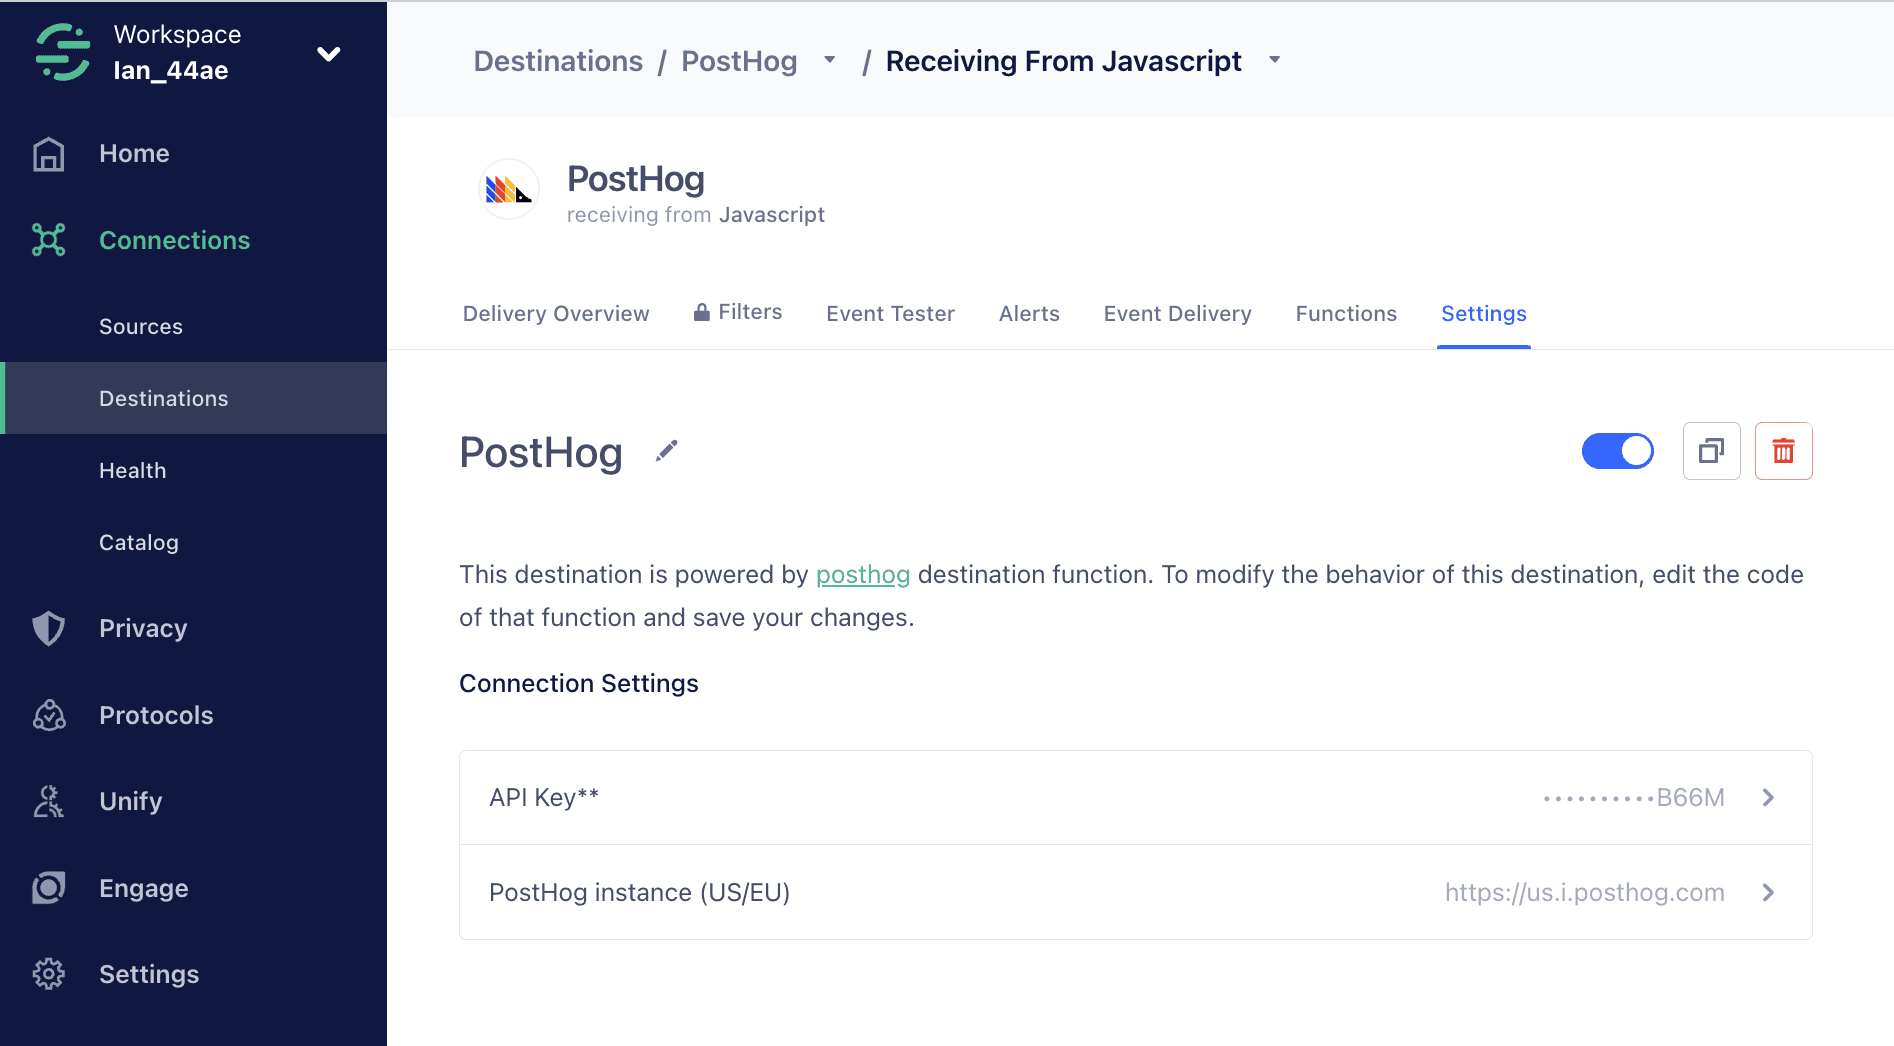
With the destination created, get your project API key and instance address from your project settings. Add them to the fields under Connection Settings.
Once added, flip the toggle to enable the destination, and when you capture events from the source, you'll start to see them in PostHog.

Enabling all of PostHog's features via Segment
The simple Segment destination only supports tracking of pageviews, custom events, and identifying users. To use the full feature set of PostHog like autocapture, session recording, feature flags, heatmaps, surveys, or the toolbar we need to load our own Javascript snippet directly.
In addition to Segment, install your PostHog snippet.
Modify the initialization to pass the Segment
analyticsobject through for PostHog to sync with:JavaScript// Load PostHog JS!function(t,e){var o,n,p,r;e.__SV||(window.posthog=e,e._i=[],e.init=function(i,s,a){function g(t,e){var o=e.split(".");2==o.length&&(t=t[o[0]],e=o[1]),t[e]=function(){t.push([e].concat(Array.prototype.slice.call(arguments,0)))}}(p=t.createElement("script")).type="text/javascript",p.async=!0,p.src=s.api_host+"/static/array.js",(r=t.getElementsByTagName("script")[0]).parentNode.insertBefore(p,r);var u=e;for(void 0!==a?u=e[a]=[]:a="posthog",u.people=u.people||[],u.toString=function(t){var e="posthog";return"posthog"!==a&&(e+="."+a),t||(e+=" (stub)"),e},u.people.toString=function(){return u.toString(1)+".people (stub)"},o="capture identify alias people.set people.set_once set_config register register_once unregister opt_out_capturing has_opted_out_capturing opt_in_capturing reset isFeatureEnabled onFeatureFlags getFeatureFlag getFeatureFlagPayload reloadFeatureFlags group updateEarlyAccessFeatureEnrollment getEarlyAccessFeatures getActiveMatchingSurveys getSurveys getNextSurveyStep".split(" "),n=0;n<o.length;n++)g(u,o[n]);e._i.push([i,s,a])},e.__SV=1)}(document,window.posthog||[]);// Segment scriptvar analytics = "<Segment analytics snippet code>";analytics.load("<your-segment-key>");analytics.ready(() => {window.posthog.init("<your-posthog-key>", {api_host: 'https://us.i.posthog.com', // Use eu.i.posthog.com for EU instancessegment: window.analytics, // Pass window.analytics here - NOTE: `window.` is importantcapture_pageview: false, // You want this false if you are going to use segment's `analytics.page()` for pageviews// When the posthog library has loaded, call `analytics.page()` explicitly.loaded: () => window.analytics.page(),});})
Sending events to PostHog
Once you set up your Segment source and PostHog destination, you can send events via Segment to PostHog. You do this through one of their source libraries or their API. The PostHog destination supports the identify, track, page, screen, group, and alias definitions.
With the Analytics.js source, you can use analytics.track('Event Name') to send events to Segment, which is then sent to PostHog. For example, this sends a user signed up event with plan and accountType event properties and a paid person property to PostHog:
Similarly, the analytics.page() function sends $pageview events and the analytics.screen() function sends $screen events to PostHog.
Identifying users
To add identify users and add person properties, you can use Segment's identify function:
This works similarly to PostHog's identify function:
- It identifies anonymous users with a distinct ID, creating a person in PostHog.
- It sets the person properties.
Aliasing users
You can also assign multiple distinct IDs to the same user using Segment's alias function (the previousId argument is optional):
See our alias docs for more details and restrictions.
Using group analytics
Although Segment has a group definition, it works different than its equivalent in PostHog.
Calling analytics.group() in Segment sends a $groupidentify event and creates a segment_group type group with the ID you pass it. For example, this creates a segment_group type with the ID Acme Corp:
If you want to set any group type on a user, you need to use the $groups property on the track call instead. For example, this creates a company type group with the ID Twitter:
FAQ
Where can I find out more?
See Segment's spec overview, Analytics.js docs, and PostHog destination for more information.
You can also find the code for the PostHog destination on GitHub.
Who maintains this app?
This app is maintained by PostHog. If you have issues with the app not functioning as intended, let us know in-app.
What if my question isn't answered above?
We love answering questions. Ask us anything via our community forum.